线程的构造
detach、join
mutex、recursive_mutex、shared_mutexlock_guard、unique_lock、shared_lockchrono
std::refjthread
线程取消
条件变量
wait、wait_for、wait_until
future、promise
packaged_taskasync
信号量
闩锁(latch)、屏障(Barrier)
std::this_thread::sleep_for可以用于线程睡眠。
可以使用<chrono>库下的std::chrono::milliseconds(n)来指定时间单位。
C++17之后可以使用using namespace std::chrono_literals用于把字面常量标识符映射为秒、毫秒等。
用std::thread构造。
参数1填函数地址。
参数2填函数参数,没有则不填。
遵循的是RAII,构造完即开始运行。
线程对象有detach方法用来脱离主线程的管理。防止主线程先于子线程结束导致线程因为整个进程提前终止而未执行完毕。
也可以使用th.join()方法来让主线程等待子线程执行结束。相当于WaitForSingleObject
1 2 3 4 5 6 7 8 9 10 11 12 13 14 15 16 17 18 19 20 21 22 23 24 25 26 27 28 29 30 31 32 33 34 35 36 37 38 39 40 41 42 43 #include <thread> #include <chrono> constinit int tickets = 100 ;void station (void ) void station2 (void ) int main () std::thread th (&station) ; std::thread th2 (&station2) ; th.detach (); th2. detach (); std::this_thread::sleep_for (5000 ms); } void station (void ) while (true ) { if (tickets > 0 ) { std::wcout << L"Station #1: " << tickets-- << std::endl; } else { break ; } } } void station2 (void ) while (true ) { if (tickets > 0 ) { std::wcout << L"Station #2: " << tickets-- << std::endl; } else { break ; } } }
1
2
3
4
5
6
7
8
9
10
11
12
13
14
15
16
17
18
19
20
21
22
23
24
25
26
27
28
29
30
Station #1: 100 Station #1: 99 ... Station #1: ... ... Station #1: 89 Station #1: 88 Station #1: 87 Station #2: 86 Station #2: 85 ... Station #2: ... ... Station #2: 67 Station #2: 66 Station #2: 65 Station #2: 64 Station #2: 63 Station #2: 62 Station #1: 61 Station #1: 60 ... Station #1: ... ... Station #1: 5 Station #1: 4 Station #1: 3 Station #1: 2 Station #1: 1 Station #2: 0
发现把0号票卖掉了,错误。
定义于<mutex>中。
在mutex构造函数
单纯的mutex只能锁一次。recursive_mutex可以锁多次,也可以解锁多次。
1 2 3 4 5 6 7 8 9 10 11 12 13 14 15 16 17 18 19 20 21 22 23 24 25 26 27 28 29 30 31 32 33 34 35 36 37 38 39 40 41 42 43 44 45 46 47 48 #include <iostream> #include <print> #include <thread> #include <mutex> #include <vector> #include <chrono> using namespace std::literals;void seller (std::string const & name, int & ticketsNum, std::mutex& mx) int main () std::vector<std::jthread> vec_jthreads; int tickets = 1000 ; std::mutex mx; for (int i = 0 ; i < 10 ; ++i) { std::stringstream ss; ss << "seller " << i; vec_jthreads.emplace_back (seller, ss.str (), std::ref (tickets), std::ref (mx)); } for (auto & jth : vec_jthreads) { jth.join (); } std::println ("Finally, tickets remain: {}" , tickets); return 0 ; } void seller (std::string const & name, int & tickets, std::mutex& mx) std::this_thread::sleep_for (1000 ms); while (true ) { mx.lock (); if (tickets > 0 ) { std::println ("{}: {}" , name, tickets); --tickets; mx.unlock (); } else { mx.unlock (); break ; } } }
1
2
3
4
5
6
7
8
9
10
11
12
13
14
15
16
17
18
Station #1: 500 Station #1: 499 ... Station #1: ... ... Station #1: 394 Station #1: 393 ---------------------- Station #2: 392 Station #2: 391 ... Station #2: ... ... Station #2: 5 Station #2: 4 Station #2: 3 Station #2: 2 Station #2: 1
可以看到线程1、2各自持有锁的跨度还是挺大的,这是因为在跨平台C++线程库在Windows下的执行是用Windows临界区实现的。
std::ref)
std::mutex锁是不可复制的。只能通过引用传递。
1
2
3
4
5
6
7
8
9
10
11
void station (std::mutex& mx) int main () std::mutex mx; std::thread th (&station, mx) ; th.join (); } void station (std::mutex& mx) }
此时,虽然线程函数参数类型为引用,但实际写的代码中,“mx”这个形式和值类型的形式不能区分,编译器无法对其直接解析为引用,产生二义性。(即编译器默认都先按照值传递处理,之后才去处理、区分是否为引用)std::reference_wrapper(mx),也可以简写为std::ref(mx)。在实际使用到该引用类型变量时,包裹器会自己释放出实际内容。
1
2
3
4
5
6
7
8
9
10
11
12
13
14
15
16
17
18
void station (std::mutex& mx) void station2 (std::mutex& mx) int main () std::mutex mx; std::thread th (&station, std::ref(mx)) ; std::thread th2 (&station2, std::ref(mx)) ; th.join (); th2. join (); } void station (std::mutex& mx) } void station2 (std::mutex& mx) }
std::ref
1
2
3
4
5
6
7
8
9
10
11
12
13
14
15
16
17
18
void fun (int n, int & ret) for (int i = 1 ; i <= n; ++i) { cout << "thread fun" << endl; std::this_thread::sleep_for (std::chrono::milliseconds (100 )); } ret = n; cout << "thread fun end" << endl; return n; } int main () int x = 10 ; std::thread tha (fun, 5 , std::ref(x)) ; tha.join (); cout << x << endl; }
1
2
3
4
5
6
7
int main () int x = 10 ; std::thread tha (fun, 5 , x) ; tha.join (); cout << x << endl; }
为什么直接传x不能编译通过呢?因为thread的构造距离start线程中间有一层可变参模板组件:
1
2
template <class Function, class ... Args>explicit thread (Function&& f, Args&&... args)
1
2
3
4
5
template <class _Fn , class ... _Args>explicit thread (_Fn&& _Fx, _Args&&... _Ax) _Start(_STD forward<_Fn>(_Fx), _STD forward<_Args>(_Ax)...); }
thread的构造需要先通过这个组件,则由于args是按[模板 &&]接收,如果直接单纯传x,则会识别为普通的int值传递,在到达_Start接口后,x的int类型与参数类型int &不匹配,无法编译通过。
所以需要一个特殊的机制,用std::ref显式指出把x按引用方式传递(传地址),如此,在经过模板时,按转发引用处理,经过_Start接口的完美转发后作为右值隐式转换 为int &类型,如此便可编译通过,达到按引用传参的目的。
为什么是隐式转换?
1 2 3 4 5 6 7 8 9 10 11 12 13 14 15 16 17 18 19 20 21 template <class _Ty >class reference_wrapper { public : using type = _Ty; template <class _Uty > reference_wrapper (_Uty&& _Val) { _Ty& _Ref = static_cast <_Uty&&>(_Val); _Ptr = &_Ref; } operator _Ty&() const noexcept { return *_Ptr; } private : _Ty* _Ptr{}; };
测试
1 2 3 4 5 6 7 8 9 10 11 12 13 14 15 16 17 18 19 20 21 22 23 24 25 26 27 28 29 30 31 32 33 34 35 36 37 38 39 40 41 42 43 44 #include <iostream> #include <thread> using namespace std;template <class _Ty >class my_reference_wrapper { public : using type = _Ty; template <class _Uty > my_reference_wrapper (_Uty&& _Val) { _Ty& _Ref = static_cast <_Uty&&>(_Val); _Ptr = &_Ref; } operator _Ty&() const noexcept { return *_Ptr; } private : _Ty* _Ptr{}; }; int fun (int n, int & x) for (int i = 1 ; i <= n; ++i) { cout << "thread fun" << endl; std::this_thread::sleep_for (std::chrono::milliseconds (100 )); } x = n; cout << "thread fun end" << endl; return n; } int main () int x = 10 ; std::thread tha (fun, 5 , my_reference_wrapper<int >(x)) ; tha.join (); cout << x << endl; }
1
2
3
4
5
template <class _Fn , class ... _Args>explicit thread (_Fn&& _Fx, _Args&&... _Ax) _Start(_STD forward<_Fn>(_Fx), _STD forward<_Args>(_Ax)...); }
构造tha时的第三个参数是my_reference_wrapper<int>(x),是个右值!传入thread可变参模板函数,完美转发,右值叠加右值,依然是右值,调用_Start时优先匹配&&类型的参数,但是发现没有,而且只有一个匹配的选项是:(int n, int & x),是int&类型,于是乎,无奈之举,调用成员函数operator _Ty(),即为隐式转换为&Ty的左值引用类型。
如此一来,即可把线程函数外部的x按引用传递。
Modern Cpp引入了一些变量的作用域关键字。
全局
auto(局部):在当前栈帧下
thread_local:用于修饰全局变量。不同线程访问相同名字的全局变量,会自动生成副本,对此名字变量的操作只在当前线程有效,不会影响到其他人。
定义于<mutex>中。用于帮助管理mutex。lock_guard自身析构时对mutex解锁。lock_guard对象无法复制/移动。
lock_guard是一个模板类,需要一个模板参数,如填写<std::mutex>。在C++17后,不用填写模板参数,可以自动判断程序代码大括号中的参数类型。
1
2
3
4
5
6
7
8
9
10
11
12
13
14
15
16
17
18
19
20
21
22
23
24
25
26
27
28
29
30
31
32
33
34
35
36
37
38
39
40
void station (std::mutex& mx) void station2 (std::mutex& mx) int main () std::mutex mx; std::thread th (&station, std::ref(mx)) ; std::thread th2 (&station2, std::ref(mx)) ; th.join (); th2. join (); } void station (std::mutex& mx) while (true ) { std::lock_guard<std::mutex> lck{ mx }; if (tickets > 0 ) { std::wcout << L"Station #1: " << tickets-- << std::endl; } else { break ; } } } void station2 (std::mutex& mx) while (true ) { std::lock_guard lck{ mx }; if (tickets > 0 ) { std::wcout << L"Station #2: " << tickets-- << std::endl; } else { break ; } } }
是lock_guard的多功能版,可以自己控制unlock、转移所有权。<mutex>中
和lock_guard用法一样,但是unique_lock支持转移给另一个unique_lock。(需要使用std::move)
有unlock、release、swap方法。
可以管理普通mutex,也可以管理shared_mutex。
1
2
3
4
5
6
7
8
9
10
11
12
13
14
15
16
17
18
19
20
21
22
23
24
25
26
27
void station (std::mutex& mx) void station2 (std::mutex& mx) int main () std::mutex mx; std::thread th (&station, std::ref(mx)) ; std::thread th2 (&station2, std::ref(mx)) ; th.join (); th2. join (); } void station (std::mutex& mx) while (true ) { std::unique_lock lck{ mx }; if (tickets > 0 ) { std::wcout << L"Station #1: " << tickets-- << std::endl; std::unique_lock lck2 = std::move (lck); } else { break ; } } }
1
2
3
4
5
6
7
8
9
10
11
12
13
14
15
16
17
18
19
20
Station #1: 100 Station #1: 99 ... Station #1: ... ... Station #1: 67 Station #1: 66 Station #2: 65 Station #2: 64 ... Station #2: ... ... Station #2: 8 Station #2: 7 Station #2: 6 Station #2: 5 Station #2: 4 Station #2: 3 Station #2: 2 Station #2: 1
定义于<shared_mutex>,C++17给出的共享互斥量。
Shared mutexes are especially useful when shared data can be safely read by any number of threads simultaneously, but a thread may only write the same data when no other thread is reading or writing at the same time.
消费者可以共同访问,但不能和生产者一起共享。
提供的方法:
lock_shared用于消费者共享互斥量。lock用于生产者独占互斥量。lock和lock,lock和lock_shared都互斥。
在生产者消费者模型中,lock_shared、unlock_shared用于n个消费者一起进入消费。lock、unlock用于阻断所有消费者、其他生产者 进入。
1 2 3 4 5 6 7 8 9 10 11 12 13 14 15 16 17 18 19 20 21 22 23 24 25 26 27 28 29 30 31 32 33 34 35 36 37 38 39 40 41 42 43 44 45 46 47 48 49 50 51 52 53 54 55 56 57 58 59 60 61 62 63 64 65 #include <shared_mutex> #include <iostream> #include <thread> #include <chrono> #include <mutex> constinit int tickets{ 0 };void station (std::shared_mutex& mx) void station2 (std::shared_mutex& mx) void produce (std::shared_mutex& mx) using namespace std::chrono_literals;int main () std::shared_mutex mx; std::thread consumer (&station, std::ref(mx)) ; std::thread consumer2 (&station2, std::ref(mx)) ; std::thread producer (&produce, std::ref(mx)) ; consumer.join (); consumer2. join (); producer.join (); } void produce (std::shared_mutex& mx) while (true ) { mx.lock (); std::wcout << L"Producer: " << ++tickets << std::endl; std::this_thread::sleep_for (500 ms); mx.unlock (); } } void station (std::shared_mutex& mx) while (true ) { mx.lock_shared (); if (tickets > 0 ) { std::wcout << L"Station #1: " << tickets-- << std::endl; mx.unlock_shared (); } else { mx.unlock_shared (); } } } void station2 (std::shared_mutex& mx) while (true ) { mx.lock_shared (); if (tickets > 0 ) { std::wcout << L"Station #2: " << tickets-- << std::endl; mx.unlock_shared (); } else { mx.unlock_shared (); } } }
1
2
3
4
5
6
7
8
9
10
11
12
13
14
15
16
17
18
19
20
21
22
23
Producer: 1 Station #2: 1 Station #1: 0 Producer: 0 Producer: 1 Producer: 2 Producer: 3 Station #2: 3 Station #1: 2 Station #1: 1 Producer: 1 Producer: 2 Producer: 3 Station #2: 3 Station #2: 2 Station #2: 1 Producer: 1 Station #2: 1 Producer: 1 Producer: 2 Producer: 3 Producer: 4 ...
输出中看到1个producer和2个consumer是互斥的,有一方在则另一方不动。
输出中看到0号票有时候也会被卖掉。证明了mx.lock_shared()只是让n个消费者同时拿到锁,并且没有做进一步的同步管理。
把shared_mutex的开锁解锁的动作让锁管理器(shared_lock和unique_lock)接管。
shared_mutex的lock、unlock动作让unique_lock接管shared_mutex的lock_shared、unlock_shared动作让shared_lock接管。
1 2 3 4 5 6 7 8 9 10 11 12 13 14 15 16 17 18 19 20 21 22 23 24 25 26 27 28 29 30 31 32 33 34 35 36 37 38 39 40 41 42 43 44 45 46 47 48 49 50 51 52 53 54 55 56 57 58 59 #include <shared_mutex> #include <iostream> #include <thread> #include <chrono> #include <mutex> constinit int tickets{ 0 };void station (std::shared_mutex& mx) void station2 (std::shared_mutex& mx) void produce (std::shared_mutex& mx) using namespace std::chrono_literals;int main () std::shared_mutex mx; std::thread consumer (&station, std::ref(mx)) ; std::thread consumer2 (&station2, std::ref(mx)) ; std::thread producer (&produce, std::ref(mx)) ; consumer.join (); consumer2. join (); producer.join (); } void produce (std::shared_mutex& mx) while (true ) { std::unique_lock lck{ mx }; std::wcout << L"Producer: " << ++tickets << std::endl; std::this_thread::sleep_for (500 ms); } } void station (std::shared_mutex& mx) while (true ) { std::shared_lock lck{ mx }; if (tickets > 0 ) { std::wcout << L"Station #1: " << tickets-- << std::endl; } else { } } } void station2 (std::shared_mutex& mx){ while (true ) { std::shared_lock lck{ mx }; if (tickets > 0 ) { std::wcout << L"Station #2: " << tickets-- << std::endl; } else { } } }
C++多线程与lambda表达式结合
使用lambda表达式定义一个线程函数:每100ms打印从0到100。
1 2 3 4 5 6 7 8 9 10 11 12 13 14 15 16 17 #include <iostream> #Include <thread> #include <chrono> using namespace std::chrono_literals;int main () std::thread t1 ([]() -> void { for (int i = 0 ; i <= 100 ; ++i) { std::cout << i << std::endl; std::this_thread::sleep_for(100 ms); } }) t1. join (); }
lambda表达式作为线程函数,如果有其自己的内部参数,那么就需要传入lambda表达式后,再传入其使用的参数。
1 2 3 4 5 6 7 8 9 10 11 12 13 14 15 16 17 18 19 20 21 22 23 24 25 26 27 28 29 #include <iostream> #Include <thread> #include <chrono> using namespace std::chrono_literals;int main () auto nums{ 100 }; std::thread t1 ([](auto nu) -> void { for (int i = 0 ; i <= nu; ++i) { std::cout << i << std::endl; std::this_thread::sleep_for(100 ms); } nu = 50 ; }, nums) std::thread t2 ([](int & nu) -> void { for (int i = 0 ; i <= nu; ++i) { std::cout << i << std::endl; std::this_thread::sleep_for(100 ms); } nu = 50 ; }, std::ref(nums)) t1. join (); t2. join (); }
参数按值传递:lambda形参类型可以用auto。
参数按引用传递:传参时必须用std::ref。此时由于有引用包裹器,auto不能推导。所以lambda形参类型不可以用auto &,也不可以用auto &&,必须明确ClassName &
C++20下的加强版thread类
如果main函数中没写t1的join,那么会先到return 0;,之后在main即将return 0时,t1析构时,自动地为t1调用join,则最后主线程等待t1结束后一起退出。如果明确写了join则按照普通thread的join时机。
如果只写detach,那么最后就不会自动加join,主线程退出时子线程也会退出。
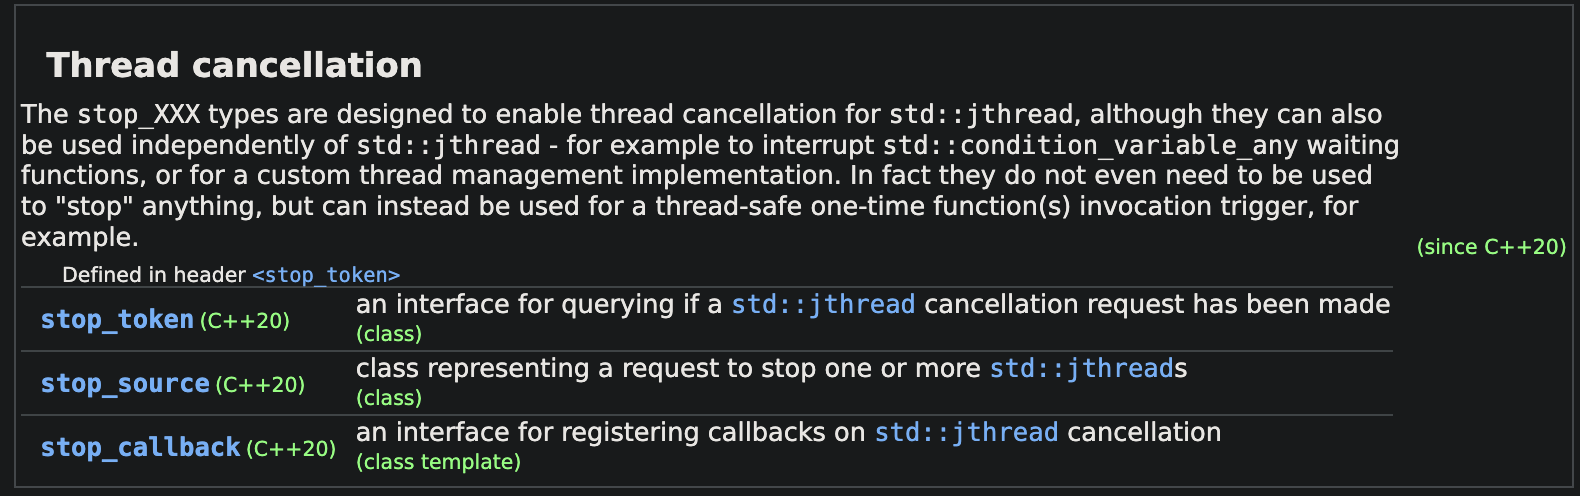
stop_XXX 类型都在<stop_token>中定义,旨在使jthread取消,尽管它们也可以独立使用 std::jthread - 例如,中断std::condition_variable_any等待函数,或用于自定义线程管理实现。事实上,它们甚至不需要用于“停止”任何东西,而是可以用于线程安全的一次性函数调用触发器。(这段话的意思大概是,stop_token只是叫做“停止”,但实际上没有真的停止动作)
token会共享一个标记性的对象
线程可以get_stop_token获得token
线程可以request_stop通知停止
旧的让线程停止的手段:需要建立如Windows下的Event,通过Event让线程停止。现在这种stop_token方法使线程停止更简洁了。
如果要传入stop_token,jthread的线程函数中内部的第1个参数必须写std::stop_token
jthread提供了request_stop函数。提供了get_stop_token函数。
以下程序表示:
主线程创建t1,内部有一个tok每100ms查看是否有外部请求停止。
程序执行3s后,主线程调用t1.request_stop()请求t1停止。
1 2 3 4 5 6 7 8 9 10 11 12 13 14 15 16 17 18 19 20 21 22 23 24 25 #include <iostream> #include <thread> using namespace std::chrono_literals;int main () std::jthread t1 ([](std::stop_token tok) -> void { for (int i = 0 ; i <= 100 ; ++i) { std::cout << i << std::endl; if (tok.stop_requested()) { break ; } std::this_thread::sleep_for(100 ms); } }) std::this_thread::sleep_for (3 s); t1. request_stop (); t1. join (); return 0 ; }
传输文件过程中,通过token这种类似于信号的东西,用于控制另一个线程。(传统方法是需要WaitForSingleObject,较为繁琐)
可看std::stop_token::stop_possible
jthread对象可以通过调用get_stop_source,返回与 jthread 对象内部保存的相同共享停止状态关联的 std::stop_source。
获取到jthread的source后就不用操作jthread了,可以通过source进行:
source.get_token(),就相当于t1.get_stop_token()source.request_stop()
1 2 3 4 5 6 7 8 9 10 11 12 13 14 15 16 17 18 19 20 21 22 23 #include <iostream> #include <thread> #include <stop_token> using namespace std::chrono_literals;int main () std::jthread t1 ([](std::stop_token tok) -> void { for (int i = 0 ; i <= 100 ; ++i) { std::cout << i << std::endl; if (tok.stop_requested()) { break ; } std::this_thread::sleep_for(100 ms); } }) auto source = t1. get_stop_source (); std::this_thread::sleep_for (3 s); source.request_stop (); }
定义于<stop_token>,用于搭配stop_token使用,指示线程取消后进行的回调操作。
需要一个stop_token和一个函数作为构造
当该stop_token对应的线程得到stop_requested信号时,调用stop_callback构造时绑定的函数。
1 2 3 4 5 6 7 8 9 10 11 12 13 14 15 16 17 18 19 20 21 22 23 24 25 26 27 #include <iostream> #include <thread> #include <stop_token> using namespace std::chrono_literals;int main () std::jthread t1 ([](std::stop_token tok) -> void { for (int i = 0 ; i <= 100 ; ++i) { std::cout << i << std::endl; if (tok.stop_requested()) { break ; } std::this_thread::sleep_for(100 ms); } }) std::stop_callback cb{ t1. get_stop_token (), []() -> void { std::wcout << L"Stopped!" << std::endl; } }; std::this_thread::sleep_for (3 s); t1. request_stop (); }
可能的输出:
1
2
3
4
5
6
7
8
9
10
11
12
13
14
15
16
17
18
19
20
21
22
23
24
25
26
27
28
29
30
0 1 2 3 4 5 6 7 8 9 10 11 12 13 14 15 16 17 18 19 20 21 22 23 24 25 26 27 Stopped! 28
从C++11就开始引入了
类似于Windows下的信号(事件)。
Modern C++中通用的用于通知、等待的工具。
需要和锁配套使用,因为cv的wait方法需要传入一个std::unique_lock<std::mutex>参数
以下程序说的是:
创建一个t1线程
t1线程尝试拿mx锁
拿到mx后,在mx锁上面wait,释放锁,之后休眠(进入等待队列)
如果没有通知则一直阻塞。
主线程休眠3s
主线程notify通知等待队列,唤醒了t1线程。
子线程t1被唤醒后,必须重新获取锁,才能返回从而继续下一步。
综上所述,wait有三大步骤:
释放锁
休眠,进入等待队列
被唤醒,尝试获取锁。
如果成功则进行下一步操作。
如果暂时没拿到锁则阻塞,直到拿到锁后才能进行下一步。
但这是因抢锁而导致阻塞,和wait的等待队列是两码事!
也就是说(再次强调):wait是主动阻塞(wait之前拿到了锁,但是条件为假,主动放弃了锁)。而一旦条件为真,且被唤醒后,抢锁没抢到,则是被动阻塞。
除了这三大步骤,还有一大前提:系统假定在wait调用前,其中的mx互斥量已上锁。所以必须在拿到锁之后才能wait。
1 2 3 4 5 6 7 8 9 10 11 12 13 14 15 16 17 18 19 20 21 #include <condition_variable> #include <mutex> std::mutex mx; std::condition_variable cv; using namespace std::chrono_literals;int main () std::jthread t1 ([]() -> void { std::unique_lock lck{ mx }; cv.wait(lck); for (int i = 0 ; i <= 100 ; ++i) { std::cout << i << std::endl; std::this_thread::sleep_for(100 ms); } }) std::this_thread::sleep_for (3 s); cv.notify_one (); }
据《操作系统导论》P252 30.1节 中的提示:
推荐在发notify信号时总是持有锁
尽管并不是所有情况下都严格需要,但有效且简单的做法还是在使用条件变量发送notify信号时持有锁(指要发送notify的线程)。有的例子是必须加锁的情况,但也有一些情况可以不加锁,而这可能是你应该避免(避免再去分情况考虑)的。因此,为了简单 ,请在调用 signal(也就是notify) 时持有锁(hold the lock when calling signal)。
这个提示的反面,即调用 wait 时持有锁,但这就不只是建议了,wait 的语义是强制要求前提持有锁的。因为 wait 调用总是假设你调用它时已经持有锁、调用者睡眠之前会释放锁以及返回前重新持有锁。
因此,可以提出一般化形式,保证程序正确:调用 signal 和 wait 时都要持有锁(hold the lock when calling signal or wait)。
就拿上面的例子来说,如果不对notify_one加以同步控制的话,有可能t1线程在lck上锁的时候,主线程恰好notify_one,导致在其wait之前唤醒,则wait之后再也没有唤醒的机会,程序就一直阻塞了。
所以,在主线程中的cv.notify_one()语句之前加锁(记得和t1中mutex变量一致)。cv.notify_one()之前加了锁,就要在cv.notify_one()之后解锁,是因为wait被唤醒之后还需要得到锁才能脱离阻塞继续下一步操作。
1
2
3
4
5
6
7
8
9
10
11
int main () std::this_thread::sleep_for (3 s); std::unique_lock lck{ mx }; cv.notify_one (); lck.unlock (); }
1
2
template <class Rep , class Period >cv_status wait_for (unique_lock<mutex>& lck, const chrono::duration<Rep,Period>& rel_time) ;
在wait的基础上,既可以通过获得通知得到唤醒,也可以计时超时得到唤醒。被notify 的行为一样,尝试获取锁,如果成功则下一步,如果失败则阻塞。std::cv_status::timeout,其他情况返回std::cv_status::no_timeout
wait是用于通知线程开始 下一步动作。wait_for则可以用于通知线程停止 。
以下程序是说:2个条件变量,cv和cv2,cv用于wait,以决定何时开始。cv2用于wait_for,结合返回值status,在一段时间等待停止的信号。
在释放了cv对应的lck后,子线程wait成功获取到锁开始下一步。
休眠3s,保证子线程可以至少执行3s。
之后与子线程竞争lck2锁,一旦主线程拿到了,当即notify给cv2,之后释放锁。
子线程:
在cv上等待,一旦获取lck则下一步。
每次for循环都先抢lck2锁
在主线程休眠的3s内,肯定能抢到。并且每次wait_for释放锁也不会被别人抢,即不会被notify,所以返回值应该都是timeout
3s主线程唤醒后,与主线程竞争lck2锁
如果子先抢到了,则这一次for循环在wait_for时lck2释放50ms,如果主线程在此期间抢到了,并且发了notify,则status为no_timeout,子线程break结束。此情况下只能打印一半。
也有可能:for每次循环结束时,释放锁,主线程在很小很小的空挡内抢到锁,导致提前notify,错过cv2等待的时机,但是这个可能很小。此情况下1000个数全部输出。
1 2 3 4 5 6 7 8 9 10 11 12 13 14 15 16 17 18 19 20 21 22 23 24 25 26 27 28 29 30 31 32 33 34 35 36 37 38 39 40 #include <condition_variable> #include <mutex> #include <iostream> std::mutex mx, mx2; std::condition_variable cv, cv2; using namespace std::chrono_literals;int main () std::jthread t1 ([]() -> void { std::unique_lock lck{ mx }; cv.wait(lck); std::cout << "Got the Notify to Start!" << std::endl; for (int i = 0 ; i <= 1000 ; ++i) { std::cout << i << std::endl; std::unique_lock lck2{ mx2 }; if (auto status = cv2. wait_for(lck2, 50 ms); status == std::cv_status::no_timeout) { std::cout << "Got the Notify to Out!" << std::endl; break ; } else { std::cout << "Timeout: No Notify" << std::endl; } } }) std::this_thread::sleep_for (1 s); std::unique_lock lck{ mx }; cv.notify_one (); lck.unlock (); std::this_thread::sleep_for (3 s); std::unique_lock lck2{ mx2 }; cv2. notify_one (); lck2. unlock (); }
输出
1
2
3
4
5
6
7
8
9
10
11
12
13
14
15
16
17
18
19
20
21
22
23
24
25
26
27
28
29
30
31
32
33
34
35
36
37
38
39
40
41
42
43
44
45
46
47
48
49
50
51
52
53
54
55
56
57
58
59
60
61
62
63
64
65
66
67
68
69
70
71
72
73
74
75
76
77
78
79
80
81
82
83
84
85
86
87
88
89
90
91
92
93
94
95
96
97
98
99
Got the Notify to Start! 0 Timeout: No Notify 1 Timeout: No Notify 2 Timeout: No Notify 3 Timeout: No Notify 4 Timeout: No Notify 5 Timeout: No Notify 6 Timeout: No Notify 7 Timeout: No Notify 8 Timeout: No Notify 9 Timeout: No Notify 10 Timeout: No Notify 11 Timeout: No Notify 12 Timeout: No Notify 13 Timeout: No Notify 14 Timeout: No Notify 15 Timeout: No Notify 16 Timeout: No Notify 17 Timeout: No Notify 18 Timeout: No Notify 19 Timeout: No Notify 20 Timeout: No Notify 21 Timeout: No Notify 22 Timeout: No Notify 23 Timeout: No Notify 24 Timeout: No Notify 25 Timeout: No Notify 26 Timeout: No Notify 27 Timeout: No Notify 28 Timeout: No Notify 29 Timeout: No Notify 30 Timeout: No Notify 31 Timeout: No Notify 32 Timeout: No Notify 33 Timeout: No Notify 34 Timeout: No Notify 35 Timeout: No Notify 36 Timeout: No Notify 37 Timeout: No Notify 38 Timeout: No Notify 39 Timeout: No Notify 40 Timeout: No Notify 41 Timeout: No Notify 42 Timeout: No Notify 43 Timeout: No Notify 44 Timeout: No Notify 45 Timeout: No Notify 46 Timeout: No Notify 47 Timeout: No Notify 48 Got the Notify to Out!
上面那个程序,经过VS编译运行在Windows11时,很有可能会出现这种情况:
1
2
3
4
5
6
7
8
9
10
11
12
13
14
15
16
17
int main () std::this_thread::sleep_for (1 s); std::wcout << L"After Sleep 1s..." << std::endl; std::unique_lock lck{ mx }; cv.notify_one (); lck.unlock (); std::wcout << L"Before Sleep 8s..." << std::endl; std::this_thread::sleep_for (8 s); std::wcout << L"After Sleep 8s..." << std::endl; std::unique_lock lck2{ mx2 }; cv2. notify_one (); lck2. unlock (); }
主线程明明8秒后才会notify_one,但是某时的输出结果下,居然很快就让子线程停止了,这是怎么回事?After Sleep 8s...,子线程就被通知了,证明notify肯定不是主线程发出的。
1
2
3
4
5
6
7
8
9
10
11
12
13
14
15
16
After Sleep 1s... Before Sleep 8s... Got the Notify to Start! 0 Timeout: No Notify 1 Timeout: No Notify 2 Timeout: No Notify 3 Timeout: No Notify 4 Timeout: No Notify 5 Got the Notify to Out!
在wait(普通、for、until)等待过程中,线程可能会因为假唤醒而提前被唤醒,而不是因为条件变量被通知。
假唤醒可以看作是操作系统故意替程序员notify_one,会让子线程会认为wait_for已经被唤醒,从而退出循环。
普通的wait在Windows下不会假唤醒。而在Unix、Linux、Solaris、AIX中行为可能会不同。
在当前的代码中,当wait_for返回时,仅通过检查timeout与否来决定是否退出循环。如果是因为假唤醒而返回,status == std::cv_status::no_timeout可能依然为真,这会导致线程提前结束。
为了防止假唤醒带来的问题,通常的做法是在等待后检查共享条件变量状态是否满足。你可以通过在wait_for之后再检查一个bool标志(例如stop_requested)来决定是否退出循环。cv2.notify_one语句之前置为true。这样,不仅要通过判断是否timeout,还要判断bool标志,以确信是我们自己发出的唤醒。
1 2 3 4 5 6 7 8 9 10 11 12 13 14 15 16 17 18 19 20 21 22 23 24 25 26 27 28 29 30 31 32 33 34 35 36 37 38 39 40 41 42 43 44 45 46 47 48 #include <condition_variable> #include <mutex> #include <iostream> std::mutex mx, mx2; std::condition_variable cv, cv2; bool stop_requested = false ;using namespace std::chrono_literals;int main () std::jthread t1 ([]() -> void { std::unique_lock lck{ mx }; cv.wait(lck); std::cout << "Got the Notify to Start!" << std::endl; for (int i = 0 ; i <= 1000 ; ++i) { std::cout << i << std::endl; std::unique_lock lck2{ mx2 }; if (auto status = cv2. wait_for(lck2, 50 ms); status == std::cv_status::no_timeout && stop_requested == true ) { std::cout << "Got the Notify to Out!" << std::endl; break ; } else { std::cout << "Timeout: No Notify" << std::endl; } } }) std::this_thread::sleep_for (1 s); std::wcout << L"After Sleep 1s..." << std::endl; std::unique_lock lck{ mx }; cv.notify_one (); lck.unlock (); std::wcout << L"Before Sleep 8s..." << std::endl; std::this_thread::sleep_for (8 s); std::wcout << L"After Sleep 8s..." << std::endl; std::unique_lock lck2{ mx2 }; stop_requested = true ; cv2. notify_one (); lck2. unlock (); }
1 wait (lck, [&stop_requested]() -> bool { return stop_requested; });
输出
1
2
3
4
5
6
7
8
9
10
11
12
13
14
15
16
17
18
19
20
21
22
23
24
25
26
27
28
29
30
31
32
33
34
35
36
37
38
39
40
41
42
43
44
45
46
47
48
49
50
51
52
53
54
55
56
57
58
59
60
61
62
63
64
65
66
67
68
69
70
71
72
73
74
75
76
77
78
79
80
81
82
83
84
85
86
87
88
89
90
91
92
93
94
95
96
97
98
99
100
101
102
103
104
105
106
107
108
109
110
111
112
113
114
115
116
117
118
119
120
121
122
123
124
125
126
127
128
129
130
131
132
133
134
135
136
137
138
139
140
141
142
143
144
145
146
147
148
149
150
151
152
153
154
155
156
157
158
159
160
161
162
163
164
165
166
167
168
169
170
171
172
173
174
175
176
177
178
179
180
181
182
183
184
185
186
187
188
189
190
191
192
193
194
195
196
197
198
199
200
201
202
203
204
205
206
207
208
209
210
211
212
213
214
215
216
217
218
219
220
221
222
223
224
225
226
227
228
229
230
231
232
233
234
235
236
237
238
239
240
241
242
243
244
245
246
247
248
249
250
251
252
253
254
255
256
257
258
259
260
261
262
263
264
265
After Sleep 1s... Before Sleep 8s... Got the Notify to Start! 0 Timeout: No Notify 1 Timeout: No Notify 2 Timeout: No Notify 3 Timeout: No Notify 4 Timeout: No Notify 5 Timeout: No Notify 6 Timeout: No Notify 7 Timeout: No Notify 8 Timeout: No Notify 9 Timeout: No Notify 10 Timeout: No Notify 11 Timeout: No Notify 12 Timeout: No Notify 13 Timeout: No Notify 14 Timeout: No Notify 15 Timeout: No Notify 16 Timeout: No Notify 17 Timeout: No Notify 18 Timeout: No Notify 19 Timeout: No Notify 20 Timeout: No Notify 21 Timeout: No Notify 22 Timeout: No Notify 23 Timeout: No Notify 24 Timeout: No Notify 25 Timeout: No Notify 26 Timeout: No Notify 27 Timeout: No Notify 28 Timeout: No Notify 29 Timeout: No Notify 30 Timeout: No Notify 31 Timeout: No Notify 32 Timeout: No Notify 33 Timeout: No Notify 34 Timeout: No Notify 35 Timeout: No Notify 36 Timeout: No Notify 37 Timeout: No Notify 38 Timeout: No Notify 39 Timeout: No Notify 40 Timeout: No Notify 41 Timeout: No Notify 42 Timeout: No Notify 43 Timeout: No Notify 44 Timeout: No Notify 45 Timeout: No Notify 46 Timeout: No Notify 47 Timeout: No Notify 48 Timeout: No Notify 49 Timeout: No Notify 50 Timeout: No Notify 51 Timeout: No Notify 52 Timeout: No Notify 53 Timeout: No Notify 54 Timeout: No Notify 55 Timeout: No Notify 56 Timeout: No Notify 57 Timeout: No Notify 58 Timeout: No Notify 59 Timeout: No Notify 60 Timeout: No Notify 61 Timeout: No Notify 62 Timeout: No Notify 63 Timeout: No Notify 64 Timeout: No Notify 65 Timeout: No Notify 66 Timeout: No Notify 67 Timeout: No Notify 68 Timeout: No Notify 69 Timeout: No Notify 70 Timeout: No Notify 71 Timeout: No Notify 72 Timeout: No Notify 73 Timeout: No Notify 74 Timeout: No Notify 75 Timeout: No Notify 76 Timeout: No Notify 77 Timeout: No Notify 78 Timeout: No Notify 79 Timeout: No Notify 80 Timeout: No Notify 81 Timeout: No Notify 82 Timeout: No Notify 83 Timeout: No Notify 84 Timeout: No Notify 85 Timeout: No Notify 86 Timeout: No Notify 87 Timeout: No Notify 88 Timeout: No Notify 89 Timeout: No Notify 90 Timeout: No Notify 91 Timeout: No Notify 92 Timeout: No Notify 93 Timeout: No Notify 94 Timeout: No Notify 95 Timeout: No Notify 96 Timeout: No Notify 97 Timeout: No Notify 98 Timeout: No Notify 99 Timeout: No Notify 100 Timeout: No Notify 101 Timeout: No Notify 102 Timeout: No Notify 103 Timeout: No Notify 104 Timeout: No Notify 105 Timeout: No Notify 106 Timeout: No Notify 107 Timeout: No Notify 108 Timeout: No Notify 109 Timeout: No Notify 110 Timeout: No Notify 111 Timeout: No Notify 112 Timeout: No Notify 113 Timeout: No Notify 114 Timeout: No Notify 115 Timeout: No Notify 116 Timeout: No Notify 117 Timeout: No Notify 118 Timeout: No Notify 119 Timeout: No Notify 120 Timeout: No Notify 121 Timeout: No Notify 122 Timeout: No Notify 123 Timeout: No Notify 124 Timeout: No Notify 125 Timeout: No Notify 126 Timeout: No Notify 127 Timeout: No Notify 128 Timeout: No Notify 129 After Sleep 8s... Got the Notify to Out!
1
2
template <class Clock , class Duration >cv_status wait_until (unique_lock<mutex>& lck, const chrono::time_point<Clock,Duration>& abs_time) ;
和wait_for行为一样,不同点在于:
wait_for的时间是时间段、间隔。wait_until的时间是时间点。
在标头 <future> 中定义
顾名思义,future就是为了用于获取返回值的。内部包装了一个任务或函数。
future是给期待方使用来get获取值的。
以下程序表示:子线程期待一个值,此值由主线程提供。通过给子线程传入future实现。fut.get()阻塞式等待主线程对fut相应的promise发送信息。
1 2 3 4 5 6 7 8 9 10 11 12 13 14 15 16 17 18 #include <future> #include <chrono> using namespace std::chrono_literals;int main () std::promise<int > prom; std::future<int > fut = prom.get_future (); std::jthread t ([](std::future<int > fut) -> void { std::wcout << L"Start & Wait..." << std::endl; int val = fut.get(); std::wcout << L"Got a value: " << val << std::endl; }, std::move(fut)) std::this_thread::sleep_for (5 s); prom.set_value (50 ); std::this_thread::sleep_for (1 s); }
输出:
1
2
Start & Wait... Got a value: 50
用shared_future可以让多个线程同时监听一个共享的future。fut.share()即可获得shared_future类型的future,可以传入到线程函数中使用。
不要多次调用fut.share(),否则之前的shared_future会失效。
1
2
3
4
5
6
7
8
9
10
11
12
13
14
15
16
17
18
19
20
21
22
int main () std::promise<int > prom; auto fut = prom.get_future (); auto shared_fut = fut.share (); std::jthread t1 ([](std::shared_future<int > shared_fut) -> void { std::wcout << L"t1 Start & Wait..." << std::endl; auto val = shared_fut.get(); std::wcout << L"t1 Got a value: " << val << std::endl; }, shared_fut) std::jthread t2 ([](std::shared_future<int > shared_fut) -> void { std::wcout << L"t2 Start & Wait..." << std::endl; auto val = shared_fut.get(); std::wcout << L"t2 Got a value: " << val << std::endl; }, shared_fut) std::this_thread::sleep_for (5 s); prom.set_value (50 ); std::this_thread::sleep_for (1 s); }
输出:
1
2
3
4
t2 Start & Wait... t1 Start & Wait... t2 Got a value: 50 t1 Got a value: 50
用于从子线程获得输出值。
与promise一样,packaged_task 是承诺方,是给出值的。可以调用get_future获得其对应的future。期待方可以通过此future获取其返回值。
创建子线程时,传入定义好的 packaged_task,需要std::move移动。
以下程序表示:主线程期待一个值,此值由子线程提供。通过给子线程传入 packaged_task 实现。
1 2 3 4 5 6 7 8 9 10 11 12 13 14 15 16 17 18 19 20 21 #include <future> using namespace std::chrono_literals;int main () std::packaged_task<int (int )> pkg{ [](int v) -> int { for (auto i = v; i >= 0 ; --i) { std::cout << i << std::endl; std::this_thread::sleep_for (200 ms); } return 3 ; }}; auto fut = pkg.get_future (); std::jthread t (std::move(pkg), 50 ) ; int v = fut.get (); std::wcout << L"main thread got a value: " << v << std::endl; }
相当于包装好的thread(packaged_task, ...)。可以直接返回一个future。并且定义后相当于直接创建了子线程。
参数1:Launch Policy
有两个选项:std::launch::deferred、std::launch::async。
默认是std::launch::async,意为立即执行。
std::launch::deferred意为在他人fut.get()时才执行。
参数2:fn
参数3:函数参数
以下程序表示:主线程期待一个值,此值由子线程提供。通过async创建子线程实现。
1
2
3
4
5
6
7
8
9
10
11
12
13
14
int main () auto fut = std::async ([](int v) -> int { for (auto i = v; i > 0 ; --i) { std::cout << i << std::endl; std::this_thread::sleep_for (200 ms); } return 3 ; }, 50 ); int v = fut.get (); std::wcout << L"main thread got a value: " << v << std::endl; }
以上是async的简单应用。
还有一些特性:所谓异步,就是主线程、async动作互不干扰。比如:
1
2
3
4
5
6
7
8
9
10
11
12
13
14
15
16
17
18
int main () auto fut = std::async ([](int v) -> int { for (auto i = v; i > 0 ; --i) { std::cout << i << std::endl; std::this_thread::sleep_for (200 ms); } return 3 ; }, 50 ); std::wcout << L"main thread begin to Sleep..." << std::endl; std::this_thread::sleep_for (5 s); std::wcout << L"main thread Wake up" << std::endl; int v = fut.get (); std::wcout << L"main thread got a value: " << v << std::endl; }
输出:
1
2
3
4
5
6
7
8
9
10
11
12
13
14
15
16
17
18
19
20
21
22
23
24
25
26
27
28
29
30
31
32
33
34
35
36
37
38
39
40
41
42
43
44
45
46
47
48
49
50
51
52
53
54
main thread begin to Sleep...50 49 48 47 46 45 44 43 42 41 40 39 38 37 36 35 34 33 32 31 30 29 28 27 26 main thread Wake up 25 24 23 22 21 20 19 18 17 16 15 14 13 12 11 10 9 8 7 6 5 4 3 2 1 main thread got a value: 3
至于std::launch::deferred。经过测试:
1
2
3
4
5
6
7
8
9
10
11
12
13
14
15
16
17
18
19
int main () auto fut = std::async (std::launch::deferred, [](int v) -> int { for (auto i = v; i > 0 ; --i) { std::cout << i << std::endl; std::this_thread::sleep_for (200 ms); } return 3 ; }, 50 ); std::wcout << L"main thread begin to Sleep..." << std::endl; std::this_thread::sleep_for (5 s); std::wcout << L"main thread Wake up" << std::endl; int v = fut.get (); std::wcout << L"main thread got a value: " << v << std::endl; }
发现,输出:
1
2
3
4
5
6
7
8
9
10
11
12
13
14
15
16
17
18
19
20
21
22
23
24
25
26
27
28
29
30
31
32
33
34
35
36
37
38
39
40
41
42
43
44
45
46
47
48
49
50
51
52
53
54
main thread begin to Sleep... main thread Wake up 50 49 48 47 46 45 44 43 42 41 40 39 38 37 36 35 34 33 32 31 30 29 28 27 26 25 24 23 22 21 20 19 18 17 16 15 14 13 12 11 10 9 8 7 6 5 4 3 2 1 main thread got a value: 3
意味着,该启动策略表示等待主线程先执行一部分内容,直到主线程开始fut.get()时,async再启动。
条件变量的场景用于精确控制线程的同步,适合同步条件更复杂的场景(条件变量可以搭配一个计数器来达到信号量的效果)。
信号量的使用场景是可以简单地控制对资源的并发访问数量。
条件变量的使用较为灵活,需要手动精确控制加锁。
C++20开始。定义于<semaphore>
counting_semaphore,非负值。binary_semaphore,二值。
1
2
3
4
template <std::ptrdiff_t = >class counting_semaphore;using binary_semaphore = std::counting_semaphore<1 >;
用C++线程库信号量改写——《Windows_多线程》中示例:多个进度条同时动画 std::counting_semaphore<5> semaphore(3);代表最大值为5,初始值为3。如果最大值不填,则默认给一个超大的数。std::counting_semaphore<2> semaphore(2);代表最大值为2,初始值为2。
1 2 3 4 5 6 7 8 9 10 11 12 13 14 15 16 17 18 19 20 #include <semaphore> std::counting_semaphore<2> semaphore (2 ) ;{ { std::jthread t ([]() -> void { std::unique_lock lck{ start_mx }; start_cv.wait(lck); lck.unlock(); semaphore.acquire(); for (int i = 0 ; i < 100 ; ++i) { } semaphore.release(); }) } }
其实就是:using binary_semaphore = std::counting_semaphore<1>;
1
2
3
4
5
6
7
8
9
10
11
12
13
14
15
16
17
18
19
20
21
22
23
24
25
26
27
28
29
std::binary_semaphore bin_sema{ 0 }; { case : { std::jthread t ([]() -> void { bin_sema.acquire(); bin_sema.release(1 ); semaphore.acquire(); for (int i = 0 ; i < 100 ; ++i) { } semaphore.release(); }) } case WM_KETDOWN: { if (wParam == 'F' ) { bin_sema.release (1 ); } } }
闩锁和屏障是线程协调机制,允许任意数量的线程阻塞,直到预期数量的线程到达。闩锁不能重复使用,而屏障可以重复使用。
主要用于等待n个线程到位,之后做一些事情。