内容
- 单链表的操作
- 单链表的经典题目
单链表经典题目
Remove

比如删除34。
第1种做法,双指针
1
2
3
4
5
6
7
8
9
10
11
12
13
14
15
16
| void Remove(LinkList head, ElemType val)
{
assert(head != NULL);
ListNode* back = head;
ListNode* front = head->next;
while(front != NULL && front->data != val)
{
back = front;
front = front->next;
}
if(front == NULL)return;
back->next = front->next;
free(front);
front = NULL;
return;
}
|
第2种做法,结合API。按值找到该值节点的前驱(调用FindValue_Prev),然后调用删除Erase_Next。
1
2
3
4
5
6
| bool Erase_Next(LinkList head, ListNode *ptr);
bool Remove(LinkList head, ElemType val)
{
assert(head != NULL);
return Erase_Next(head, FindValue_Prev(head, val));
}
|

第1种做法,每次从头开始找val,重复若干次,直到找不到为止。时间复杂度为O(n2)
1
2
3
4
5
6
7
8
9
10
11
| bool Erase_Next(LinkList head, ListNode *ptr);
ListNode * FindValue_Prev(LinkList head, ElemType val);
void Remove_All(LinkList head, ElemType val)
{
assert(head != NULL);
ListNode * p = NULL;
while((p = FindValue_Prev(head, val)) != NULL)
{
Erase_Next(head, p);
}
}
|
第2种做法,思想:back指针在后面守护,front在前面探测:front遇到非val值时back前移,然后交换此时back和front的数据域。每轮front都前移一次,直到遍历完毕。


1
2
3
4
5
6
7
8
9
10
11
12
13
14
15
16
17
18
19
20
| void Remove_All(LinkList head, ElemType val)
{
assert(head != NULL);
ListNode * back = head;
ListNode * front = head->next;
while(front != NULL)
{
if(front->data != val)
{
back = back->next;
Swap(&back->data, &front->data);
}
front = front->next;
}
while(back->next != NULL)
{
Erase_Next(head, pre);
}
}
|
Reverse
三指针
时间复杂度O(n),空间复杂度O(1)
1
2
3
4
5
6
7
8
9
10
11
12
13
14
15
| void ReverseList(LinkList head)
{
assert(head != NULL);
ListNode *back = NULL;
ListNode *temp = NULL;
ListNode *front = head->next;
while(front != NULL)
{
temp = front;
front = front->next;
temp->next = back;
back = temp;
}
head->next = back;
}
|
二指针(头插)

时间复杂度O(n),空间复杂度O(1)
1
2
3
4
5
6
7
8
9
10
11
12
13
14
15
| void ReverseList(LinkList head)
{
ListNode *front = head->next;
ListNode *temp = NULL;
head->next = NULL;
while(front != NULL)
{
temp = front;
front = front->next;
temp->next = head->next;
head->next = temp;
}
}
|
头插法逆置还有一种单指针的做法,遍历把每个节点的值取出,调用Push_Front按值购买节点头插。这种做法的空间复杂度是O(n),同时还会涉及到内存泄漏的问题,因为旧有遍历过的节点没有释放。如果要在代码中主动释放,则又需要加个temp指针来记录了。一边申请,一边释放,这种做法是及其耗费资源的,不推荐。
1
2
3
4
5
6
7
8
9
10
11
12
13
14
| void ReverseList(LinkList head)
{
ListNode *front = head->next;
head->next = NULL;
while(front != NULL)
{
ElemType val = front->val;
Push_Front(head, val);
front = front->next;
}
}
|
栈
栈的特性:后进先出
用一个连续空间和push_back/pop_back/get_back模拟一个栈。
时间复杂度O(n),空间复杂度O(n)
1
2
3
4
5
6
7
8
9
10
11
12
13
14
15
16
17
18
19
20
21
22
23
24
25
26
27
28
29
| void ReverseList(LinkList head)
{
assert(head != NULL);
int len = 0;
ListNode *front = head->next;
while(p != NULL)
{
++len;
front = front->next;
}
ElemType *stack = (ElemType*)malloc(sizeof(ElemType)*len);
int top = -1;
front = head->next;
while(p != NULL)
{
top += 1;
stack[top] = p->data;
front = front->next;
}
front = head->next;
while(front != NULL)
{
p->data = stack[top];
top -= 1;
front = front->next;
}
free(stack);
stack = NULL;
}
|
递归
分析最小的递归单元:两个节点的逆置。

两个节点的逆置动作:首先first指针指向23,然后分析:要逆置23和34,需要先把23之后的逆置,而34只是一个节点,不做动作直接return自身,则last指针指向34。然后first->next->next指向first,即34指向自己,先画一个环;然后first->next = NULL,23与34切断连接。如此即完成两个节点的逆置。以此类推即是链表逆置的递归过程。
时间复杂度O(n),空间复杂度O(n)
1
2
3
4
5
6
7
8
9
10
11
12
13
14
| ListNode * Reverse(ListNode *first)
{
if(pnode==NULL || pnode->next==NULL)return first;
ListNode * last = Reverse(first->next);
first->next->next = first;
first->next = NULL;
return last;
}
void ReverseList(LinkList head)
{
assert(head != NULL);
ListNode *front = head->next;
head->next = Reverse(front);
}
|
举例:


不带头结点单链表的非递归逆置–三指针法
1
2
3
4
5
6
7
8
9
10
11
12
13
14
15
| ListNode * NiceReverseList(LinkList head)
{
if(head == NULL || head->next == NULL)return head;
ListNode *front = head;
ListNode *back = NULL;
ListNode *temp = NULL;
while(front != NULL)
{
temp = front;
front = front->next;
temp->next = back;
back = temp;
}
return back;
}
|
倒数第k
打印不带头节点的单链表中倒数第k个节点的数据。

len减k法
打印第n-k+1个节点。
比如,我们有5个节点,要求打印倒数第2个节点。则等效于打印正数第5-2+1个节点。
1
2
3
4
5
6
7
8
9
10
11
12
13
14
15
16
17
18
19
20
| void PrintKth_List(LinkList head, int k)
{
if(head == NULL || k < 1)return;
int count = 0;
ListNode *front = head;
while(front != NULL)
{
++count;
front = front->next;
}
if(k > n)return;
front = head;
while(count-- > k)
{
front = front->next;
}
printf("%dth data of LinkList : %d. \n", front->data);
return;
}
|
递归
时间复杂度O(n),空间复杂度O(n)
1
2
3
4
5
6
7
8
9
10
11
12
13
14
15
| int PrintKth(ListNode * head, int k)
{
if(head == NULL)return 0;
int count = PrintKth(head->next, k) + 1;
if(count == k)
{
printf("%dth data of LinkList : %d. \n", front->data);
}
return count;
}
void PrintKth_List(LinkList head, int k)
{
if(head == NULL || k < 1)return;
PrintKth(head, k);
}
|
栈
双指针
即快慢指针法,使快慢指针相差k距离,同时步进,当快指针空时,则慢指针指向倒数第k值。
1
2
3
4
5
6
7
8
9
10
11
12
13
14
15
16
17
18
19
20
21
22
23
| void PrintKth_List(LinkList head, int k)
{
if(head == NULL || k < 1)return;
ListNode *front = head;
ListNode *back = head;
int count = k;
while(front!=NULL && count>0)
{
front = front->next;
--count;
}
if(count != 0)
{
if(front == NULL)return;
while(front != NULL)
{
front = front->next;
back = back->next;
}
}
printf("%dth data of LinkList : %d. \n", back->data);
return;
}
|
返回中间节点
快慢指针法,快指针一次走两个,慢指针一次走一个。
1
2
3
4
5
6
7
8
9
10
11
12
| ListNode * GetMidNode(LinkList head)
{
if(head==NULL || head->next==NULL)return head;
ListNode * front = head;
ListNode * back = head;
while(front->next!=NULL && front->next->next!=NULL)
{
front = front->next->next;
back = back->next;
}
return back;
}
|
环路
数组中的重复数字
刷题

1
2
3
4
5
6
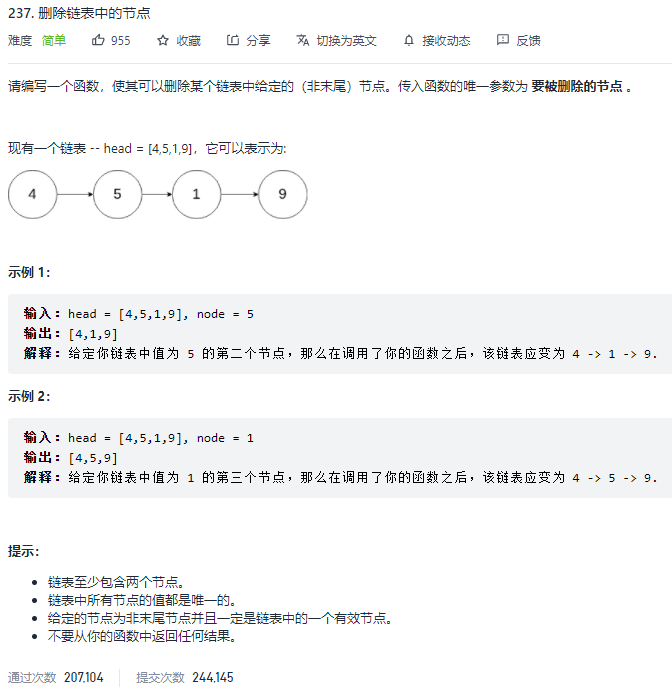
| void deleteNode(struct ListNode* node)
{
struct ListNode *p = node->next;
*node=*p;
free(p);
}
|
如果考虑最后节点,就没办法用这种方法了,因为最多只能给最后的节点的信息全赋零值,并且前继节点的next指向的地址是无法改变的。


